

Step 1. Create your account
- Go to app.retailgrid.io
- Click Sign in with Google (recommended), or enter your email and a password to sign up.
- If you signed up with email and password, we’ll send a verification email — click the link to confirm your address, then sign in. Google sign-in completes immediately.
Sign up

Step 2. Click “Upload data”
From the top-right corner:- Click Upload Data
- The Upload Data modal will open
- Products (required)
- Transactions (optional but recommended for analytics)
Upload data
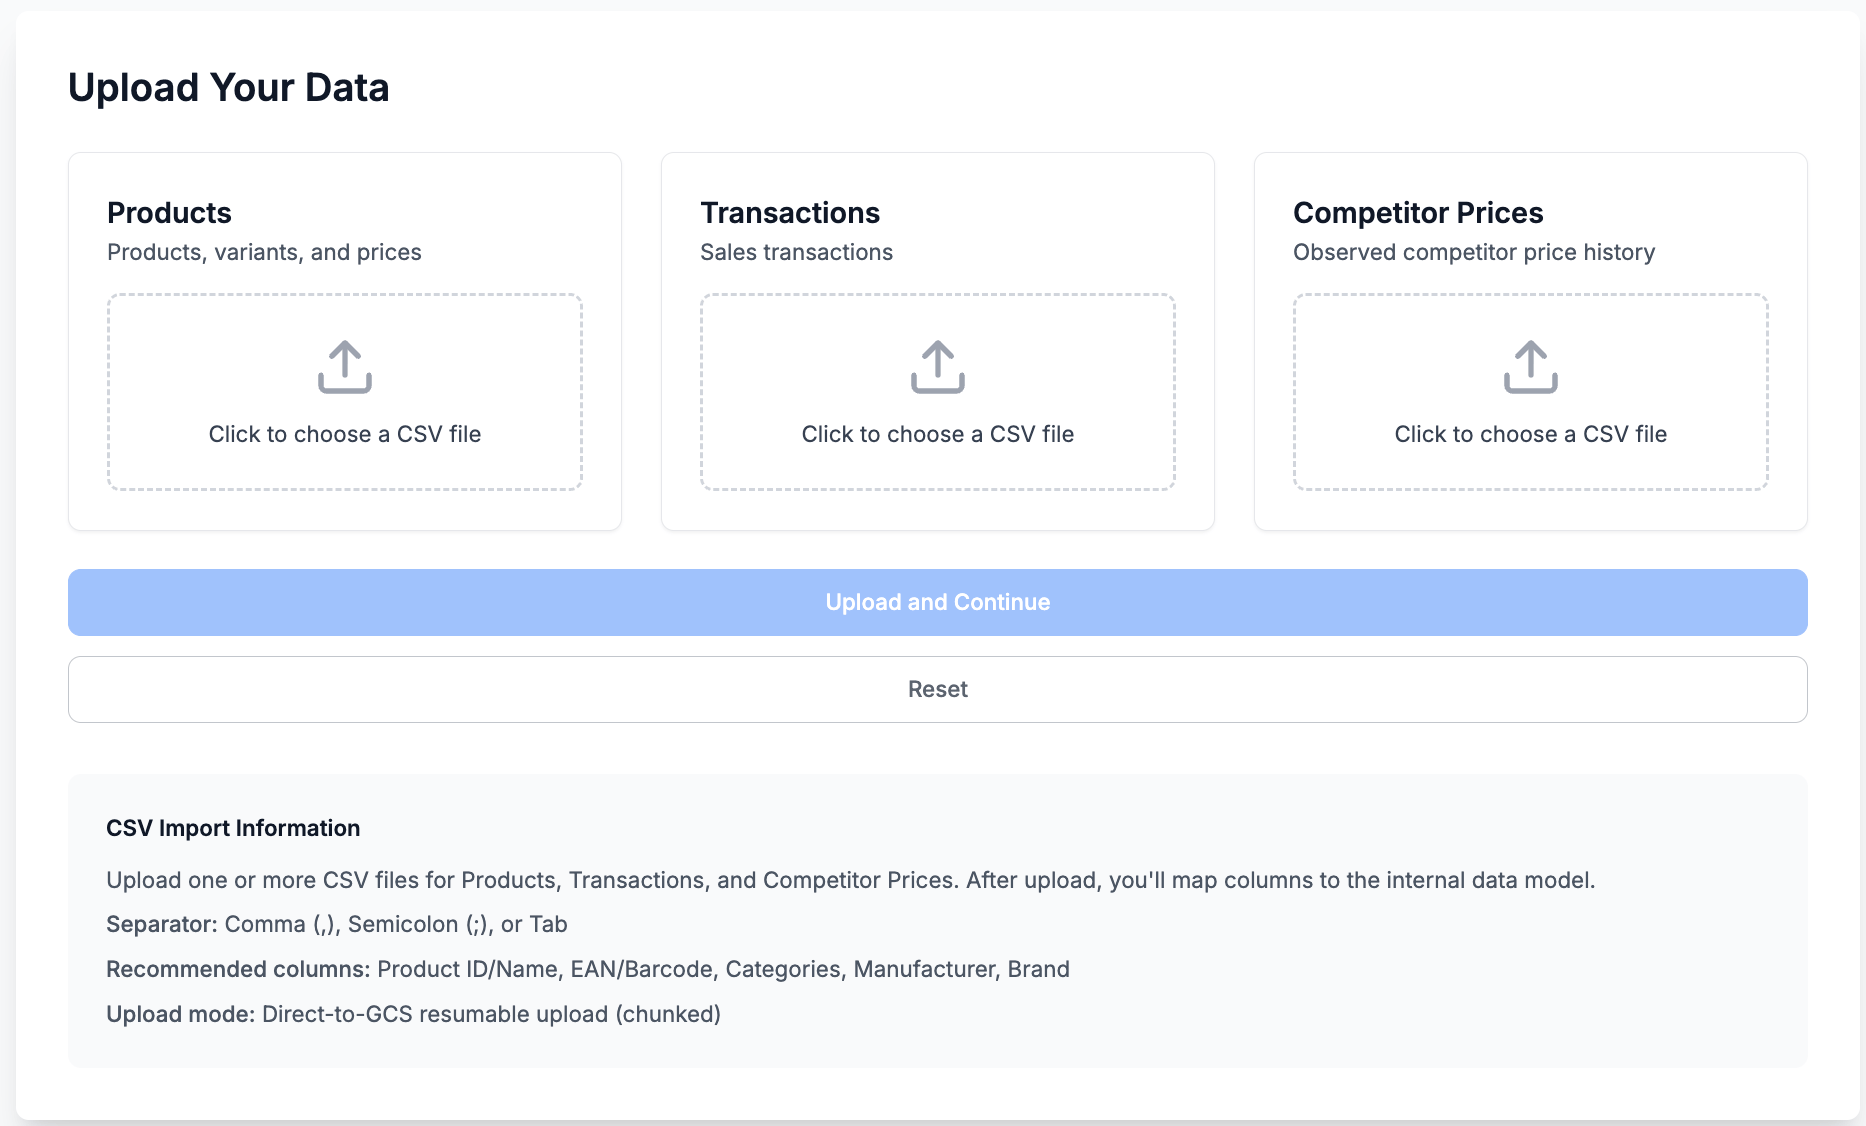
Step 3. Select your CSV file
Upload your Products CSV file. Before uploading, ensure your file follows Retailgrid data requirements. See Products data requirements.Minimum required fields
item_idproduct_namepriceunit_costsku(recommended)barcode(optional but useful)
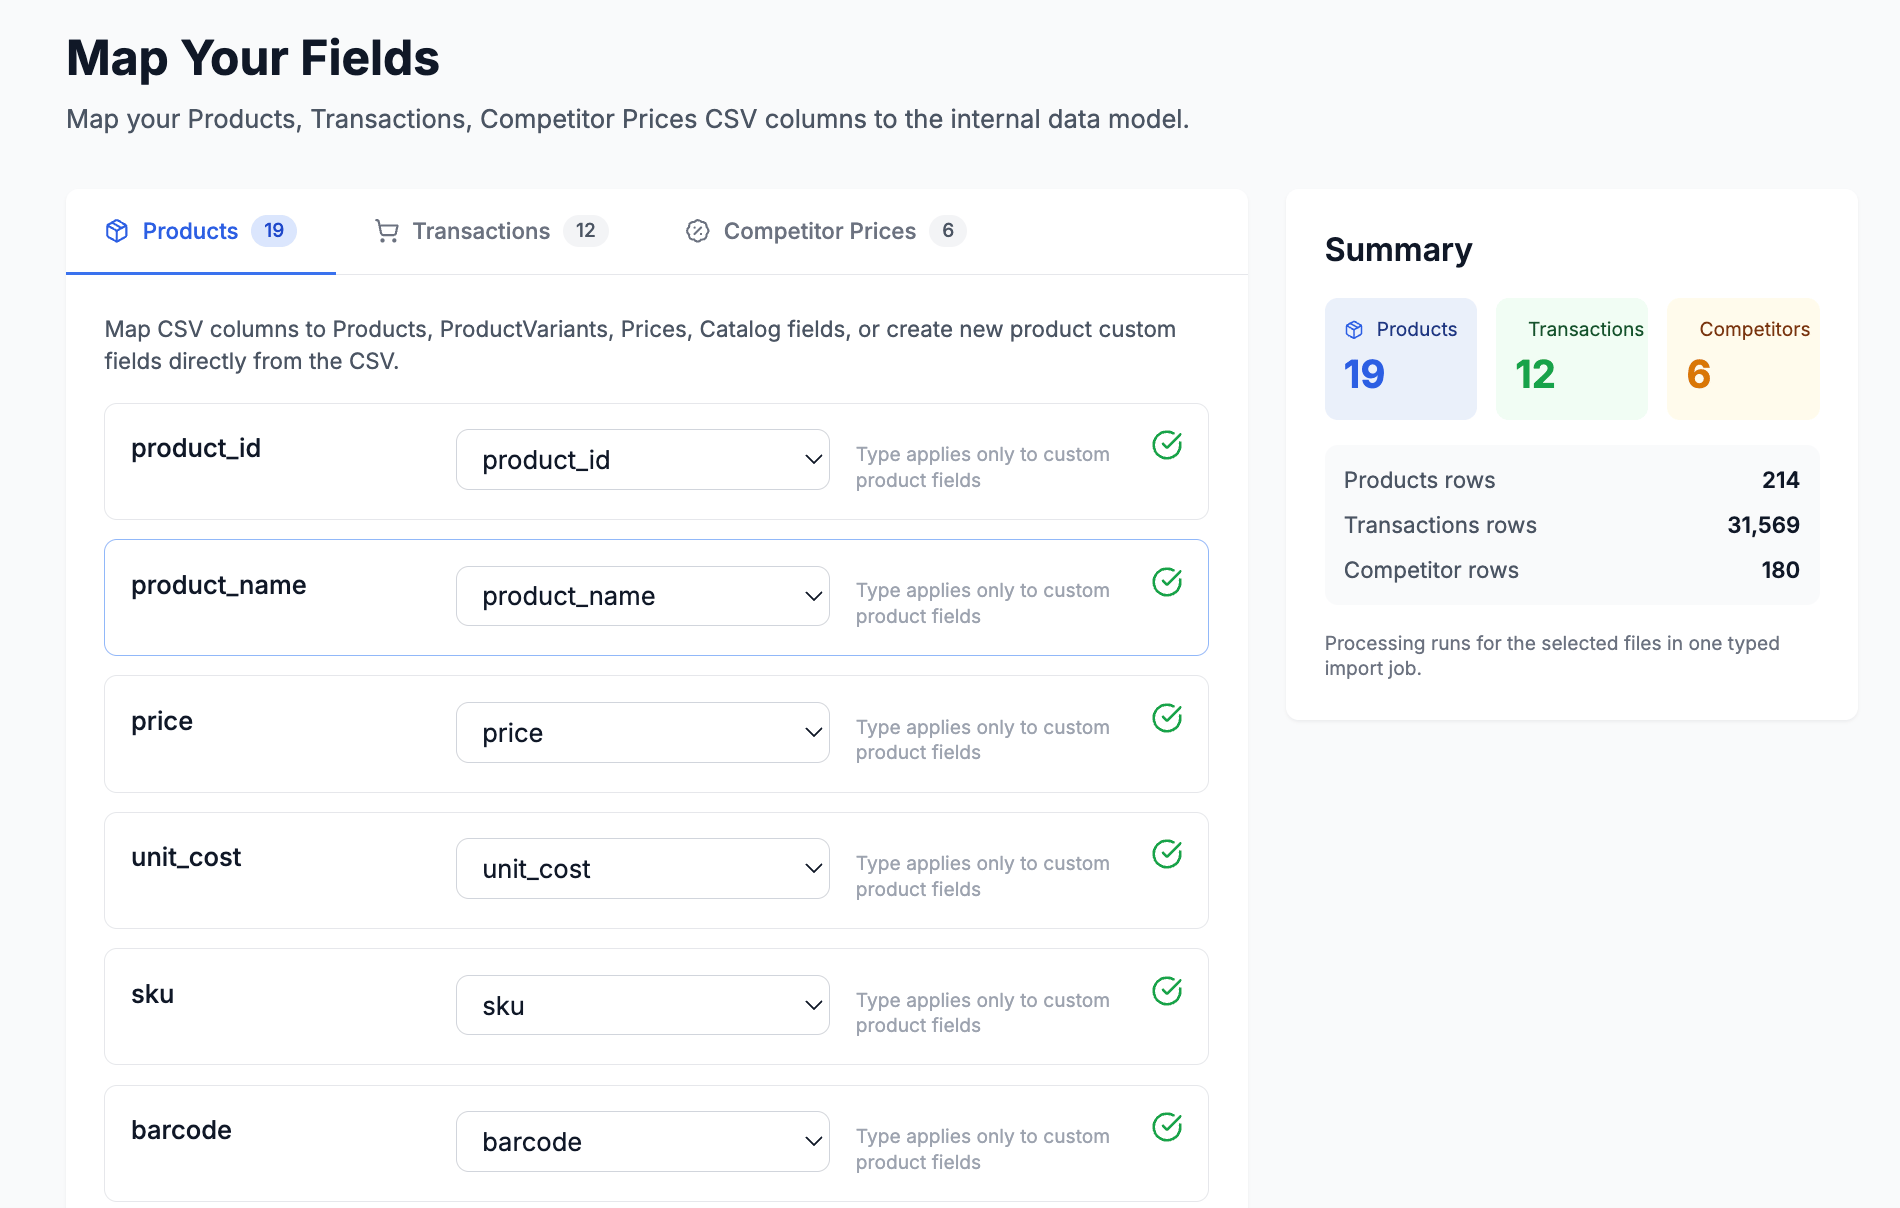
Step 4. Match your data to Retailgrid schema
You’ll enter the Map Your Fields screen. Here you:- Match your CSV column names to Retailgrid fields
- Confirm required fields are correctly mapped
- Validate data (green check = valid mapping)
- Products
- Product Variants
- Prices
- Catalog attributes (brand, manufacturer, product group, status, etc.)
Map your data
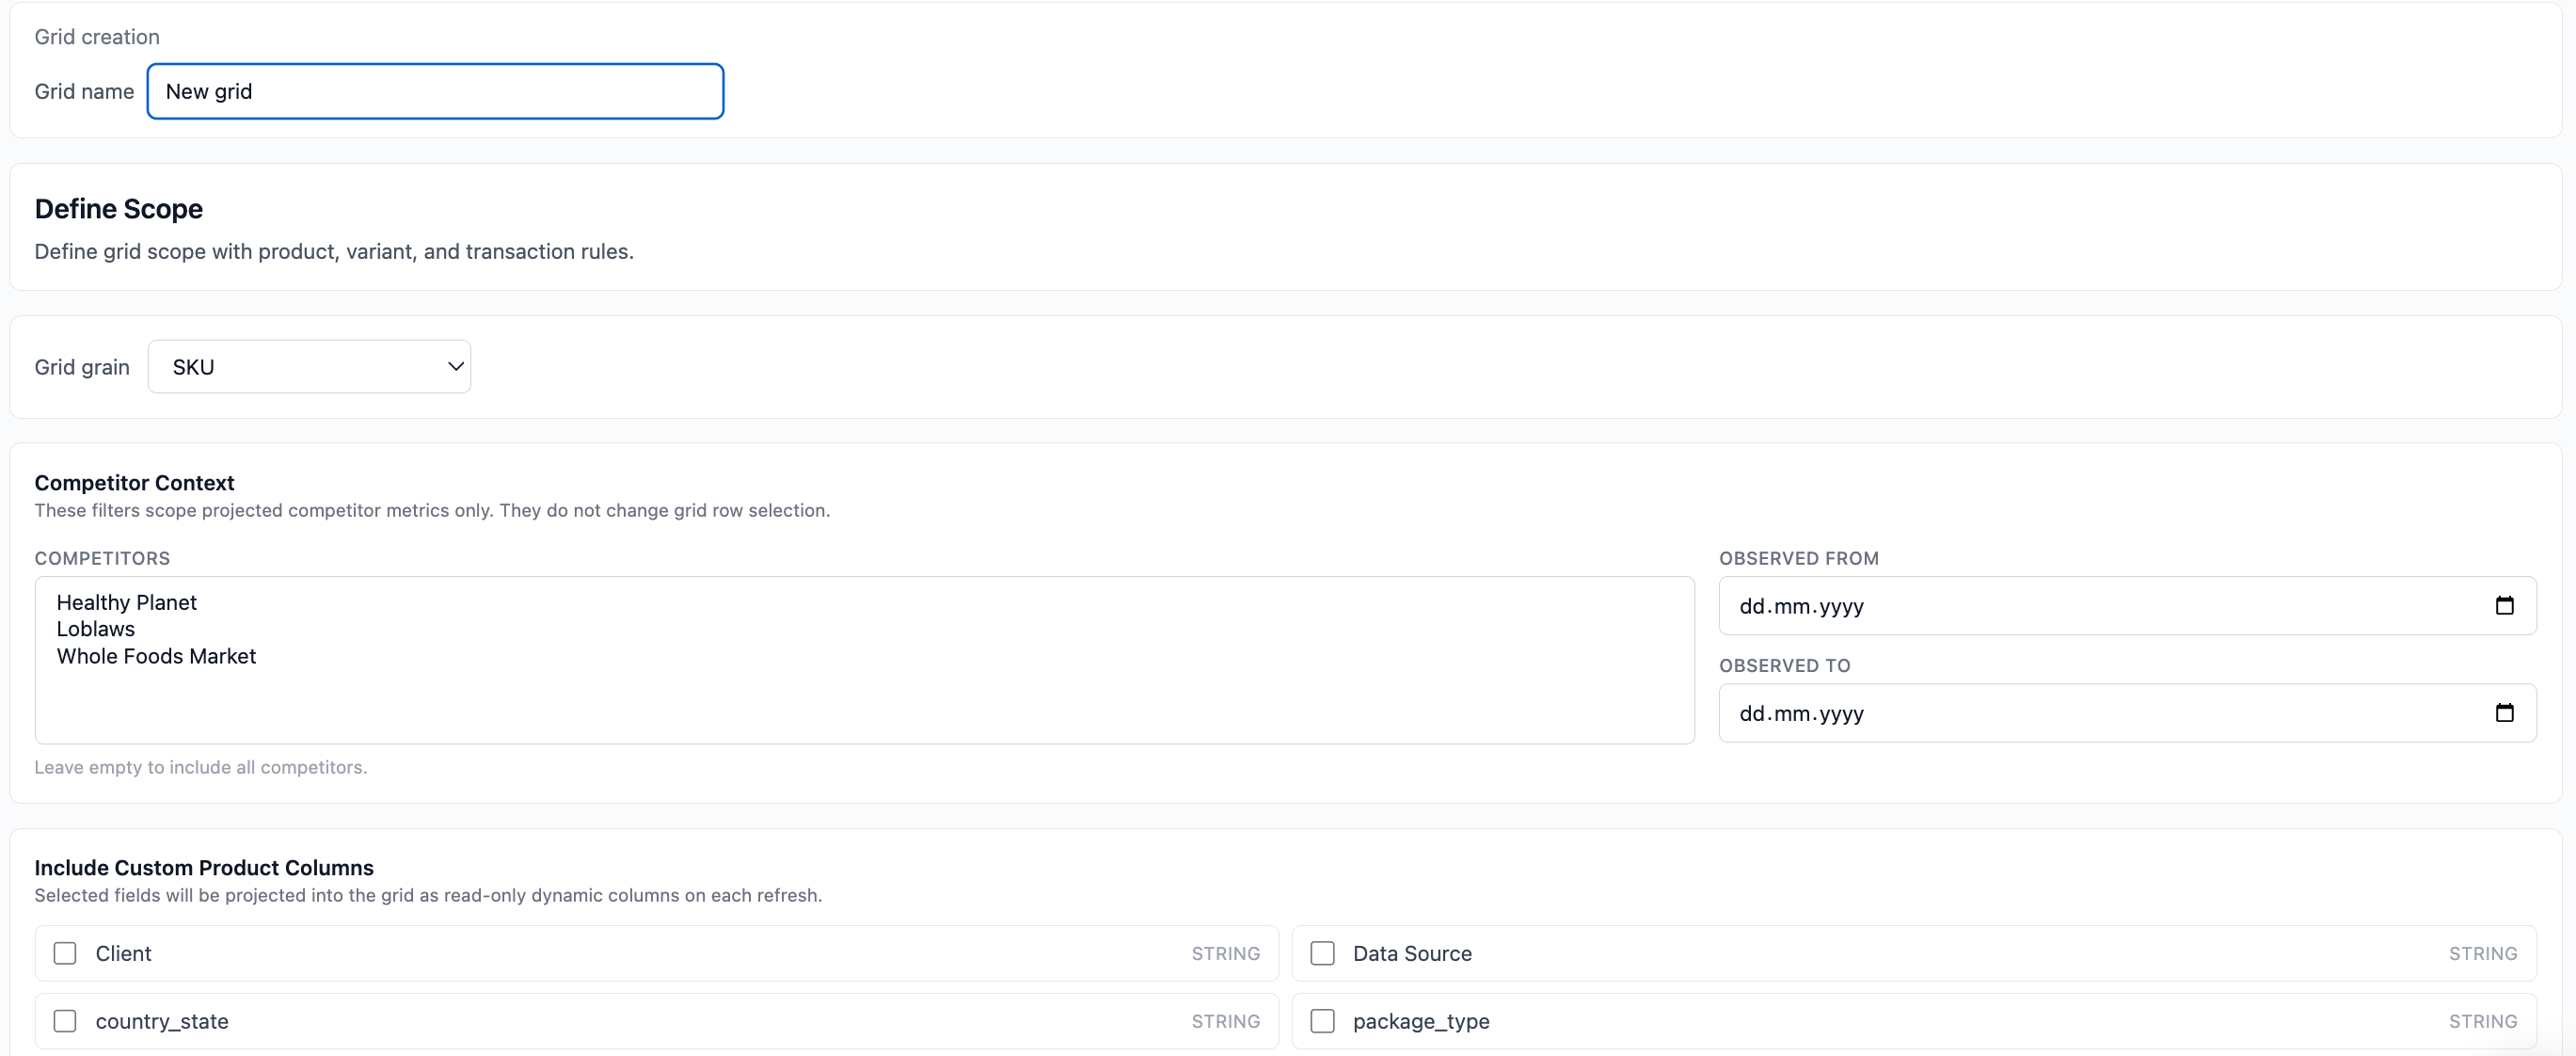
Step 5. Name your first grid and select products
After processing:- Enter a Grid Name (e.g., “March Pricing Test”)
- Select the products you want included:
- Filter by brand, type, status
- Select all or specific SKUs
- Click Proceed
Name your first grid and select products
Step 6. Your grid is created
Your Grid opens in grid view. You can now:- Filter and sort products
- Edit prices
- Add calculated columns
- Apply rules
- Run agents
- Export results
- Define product roles
- Apply pricing rules
- Analyze margins
- Model scenarios
- Track performance
What’s next?
To get the full pricing workflow:- Upload Transactions CSV for sales analytics
- Add competitor data
- Configure pricing rules
- Generate pricing strategy presentations