
What is a grid?
A Grid is:- A filtered subset of your product catalog
- A working environment for pricing and analysis
- A place to run actions, apply rules, and export results
- A specific brand (e.g., Arla)
- A category (e.g., Dairy)
- A campaign
- A pricing experiment
- A country or channel
Step 1. Go to grid
From the main navigation:- Click Grids
- Click + New (top right)
Grids view

Step 2. Name your grid
At the top:- Enter a clear, descriptive name
Example:ArlaDairy – Margin OptimizationMarch Price Test
Name your grid
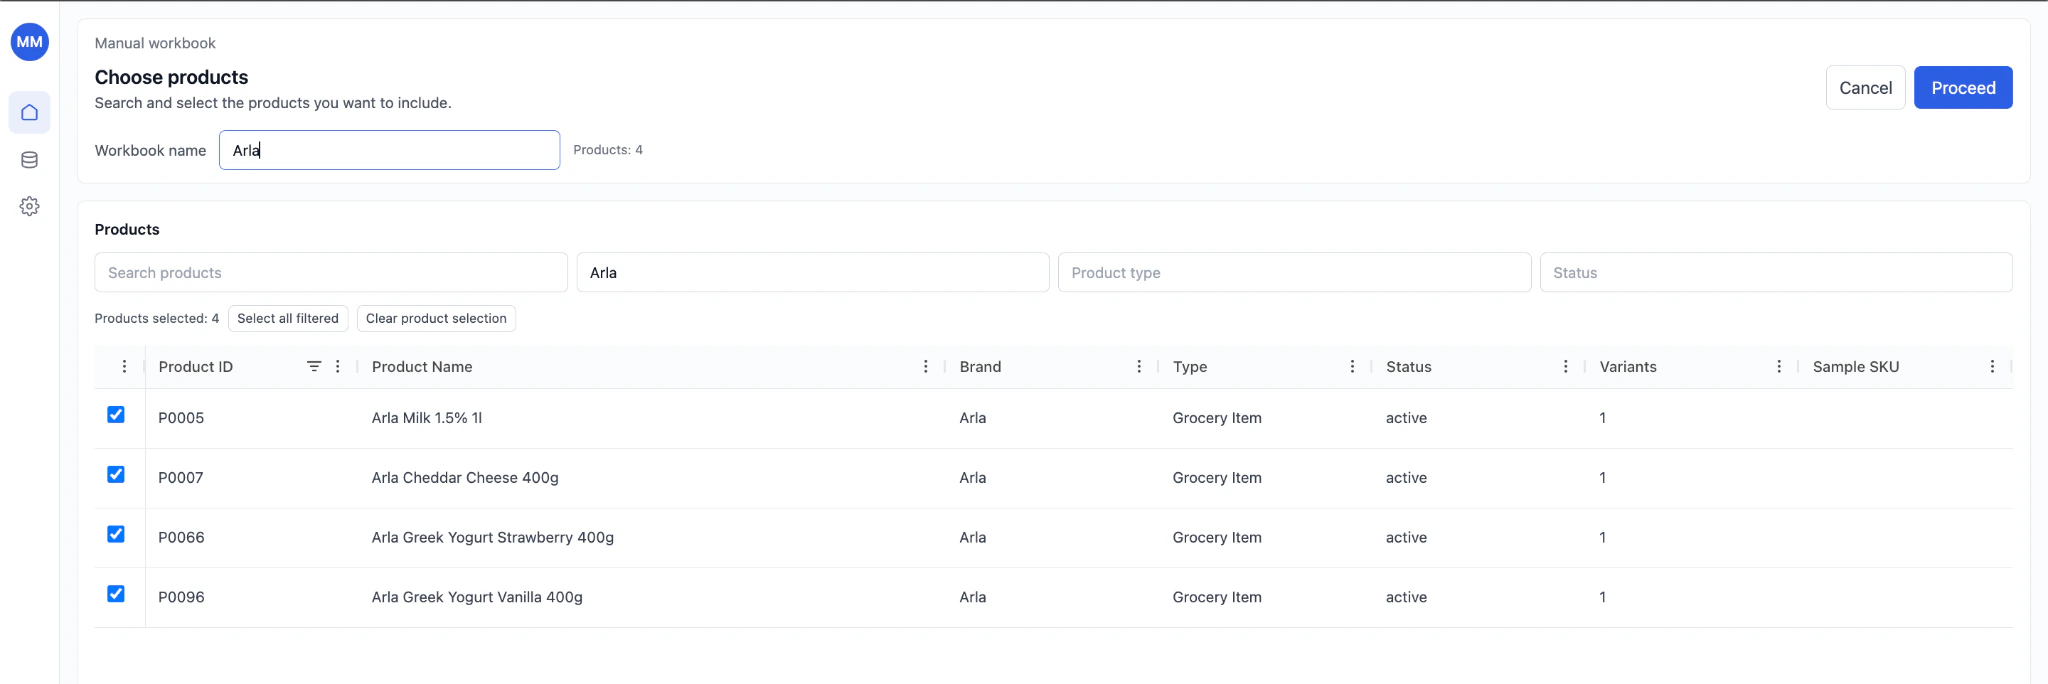
Step 3. Search and filter products
Use filters to define your working scope:- Search products (by name or ID)
- Brand
- Product type
- Status
- Filter by Brand = Arla
- Select all filtered products
Filter products

Step 4. Select products
You can:- Select individual SKUs
- Select all filtered results
- Clear selection
Step 5. Click “Proceed”
After selecting products:- Click Proceed
- RetailGrid creates your Grid
- You are redirected to the grid view
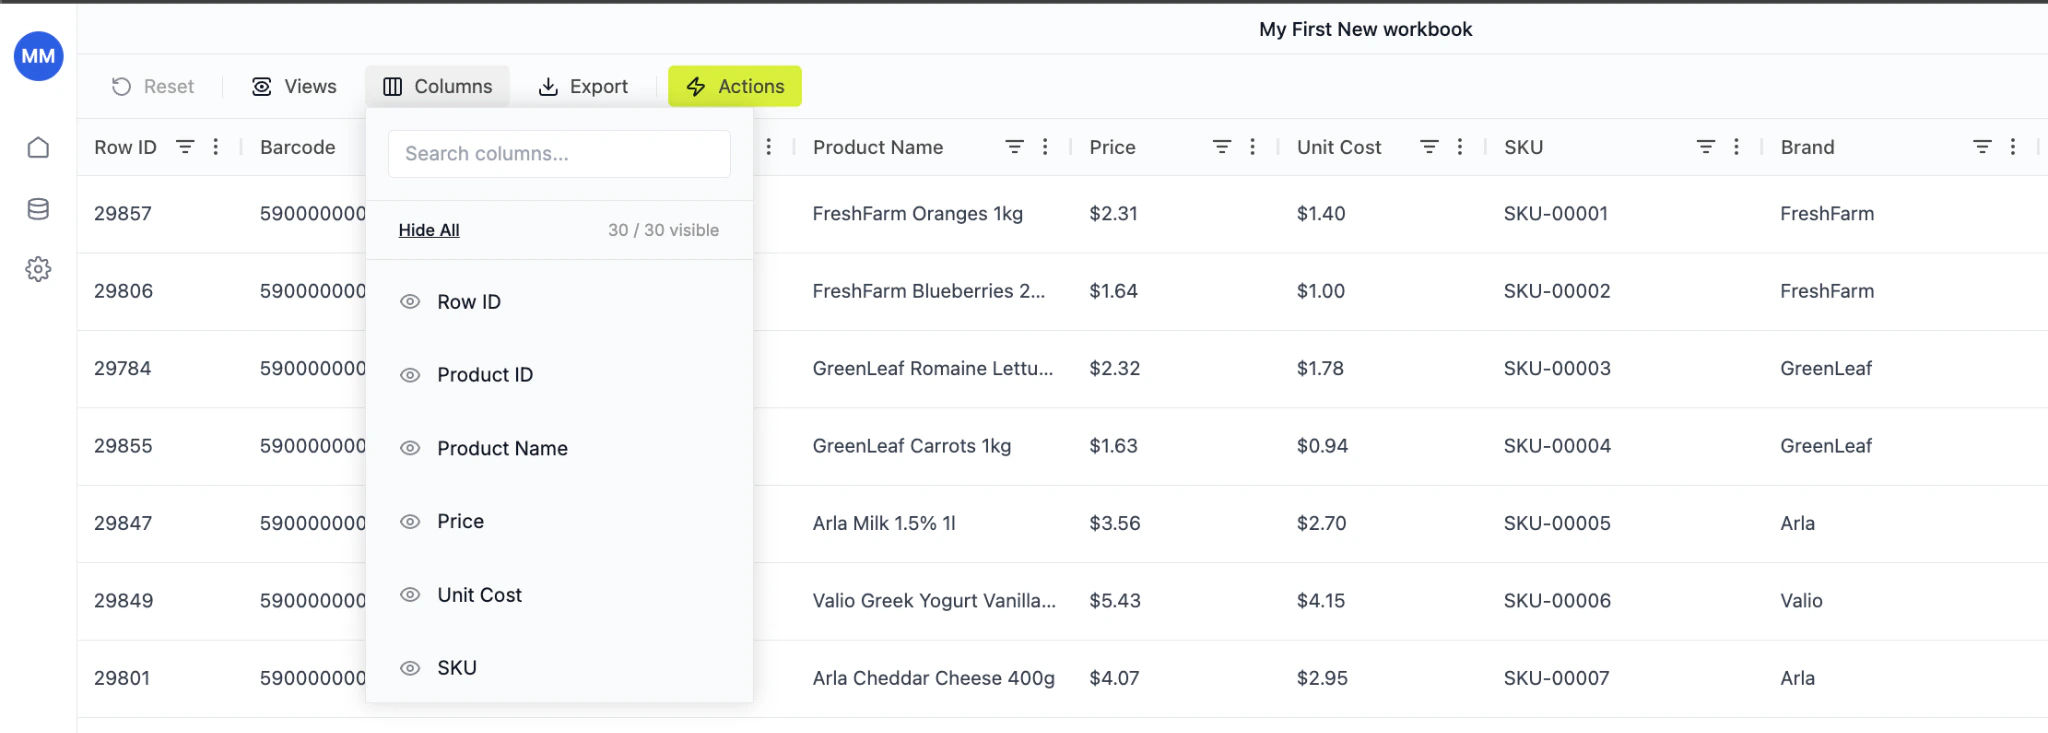
Step 6. Start working in your grid
Your new grid opens in spreadsheet-style grid format. From here you can:Analyze
- Sort and filter
- Compare price vs cost
- Review margin gaps
Modify
- Edit prices directly
- Add calculated columns
- Apply bulk updates
Execute
- Use Actions
- Run pricing rules
- Export data
- Prepare price updates
Grid is ready