
- Visible columns
- Column order
- Pinned columns
- Sorting
- Grouping
- Saved views
1. Select visible columns
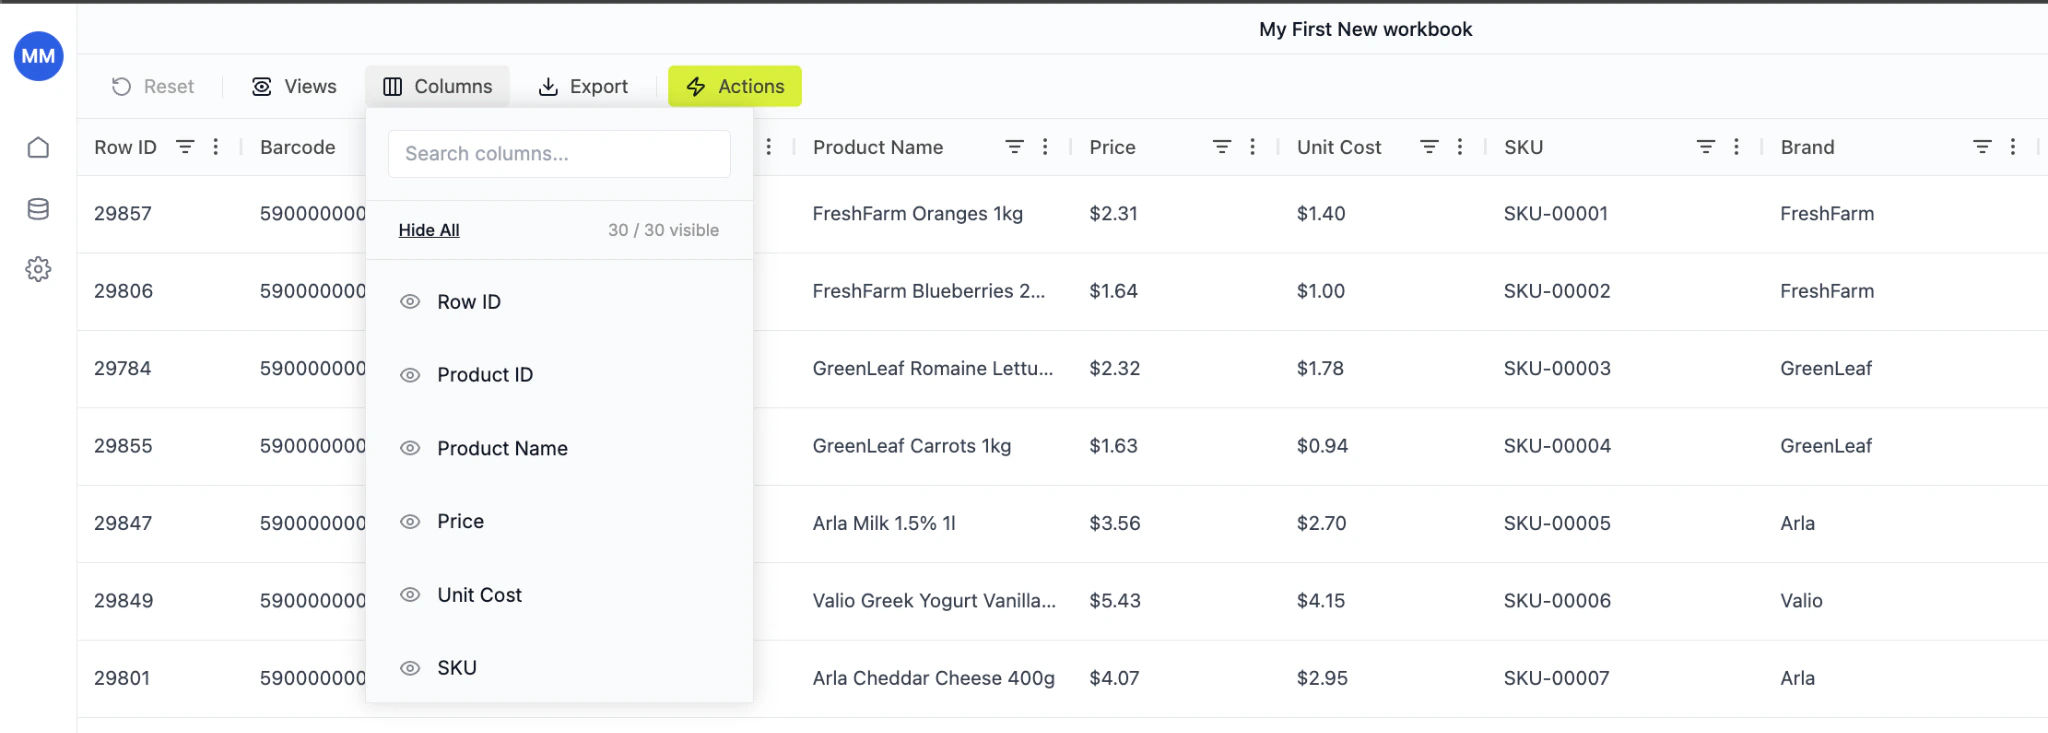
You can show or hide any column.How to do it:
- Click Columns in the top toolbar
- Use the search field to find a column
- Click the eye icon to:
- Show column
- Hide column
- You can also use Hide All if you want to rebuild the layout from scratch
Best practice:
Keep only what you need for the task.Example for pricing work:
- Product Name
- Price
- Unit Cost
- Margin
- Competitor Price
- Status
Visible columns
2. Order columns by drag and drop
You can rearrange columns freely.How to do it:
- Click and hold a column header
- Drag it left or right
- Drop it where you want it
Recommended layout:
Left (fixed reference):- Product Name
- Product ID
- Price
- Unit Cost
- Margin
- Elasticity
- Brand
- Category
- Manufacturer
3. Pin columns
Pinning keeps important columns visible while scrolling.How to pin:
- Click the three-dot menu on a column header
- Select Pin Column
- Choose:
- Pin Left
- Pin Right
When to use:
Pin Left:- Product Name
- SKU
- Status
- Actions
Pin column
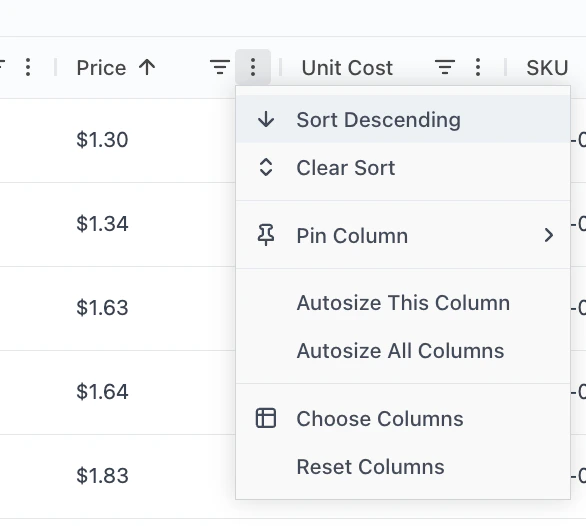
4. Sort values
You can sort any column.How to sort:
- Click column header to toggle ascending / descending
OR - Use the column menu → Sort Ascending / Descending
Example use cases:
- Sort by Price Descending → find premium items
- Sort by Unit Cost Descending → detect cost risk
- Sort by Margin Ascending → identify weak SKUs
Sorting
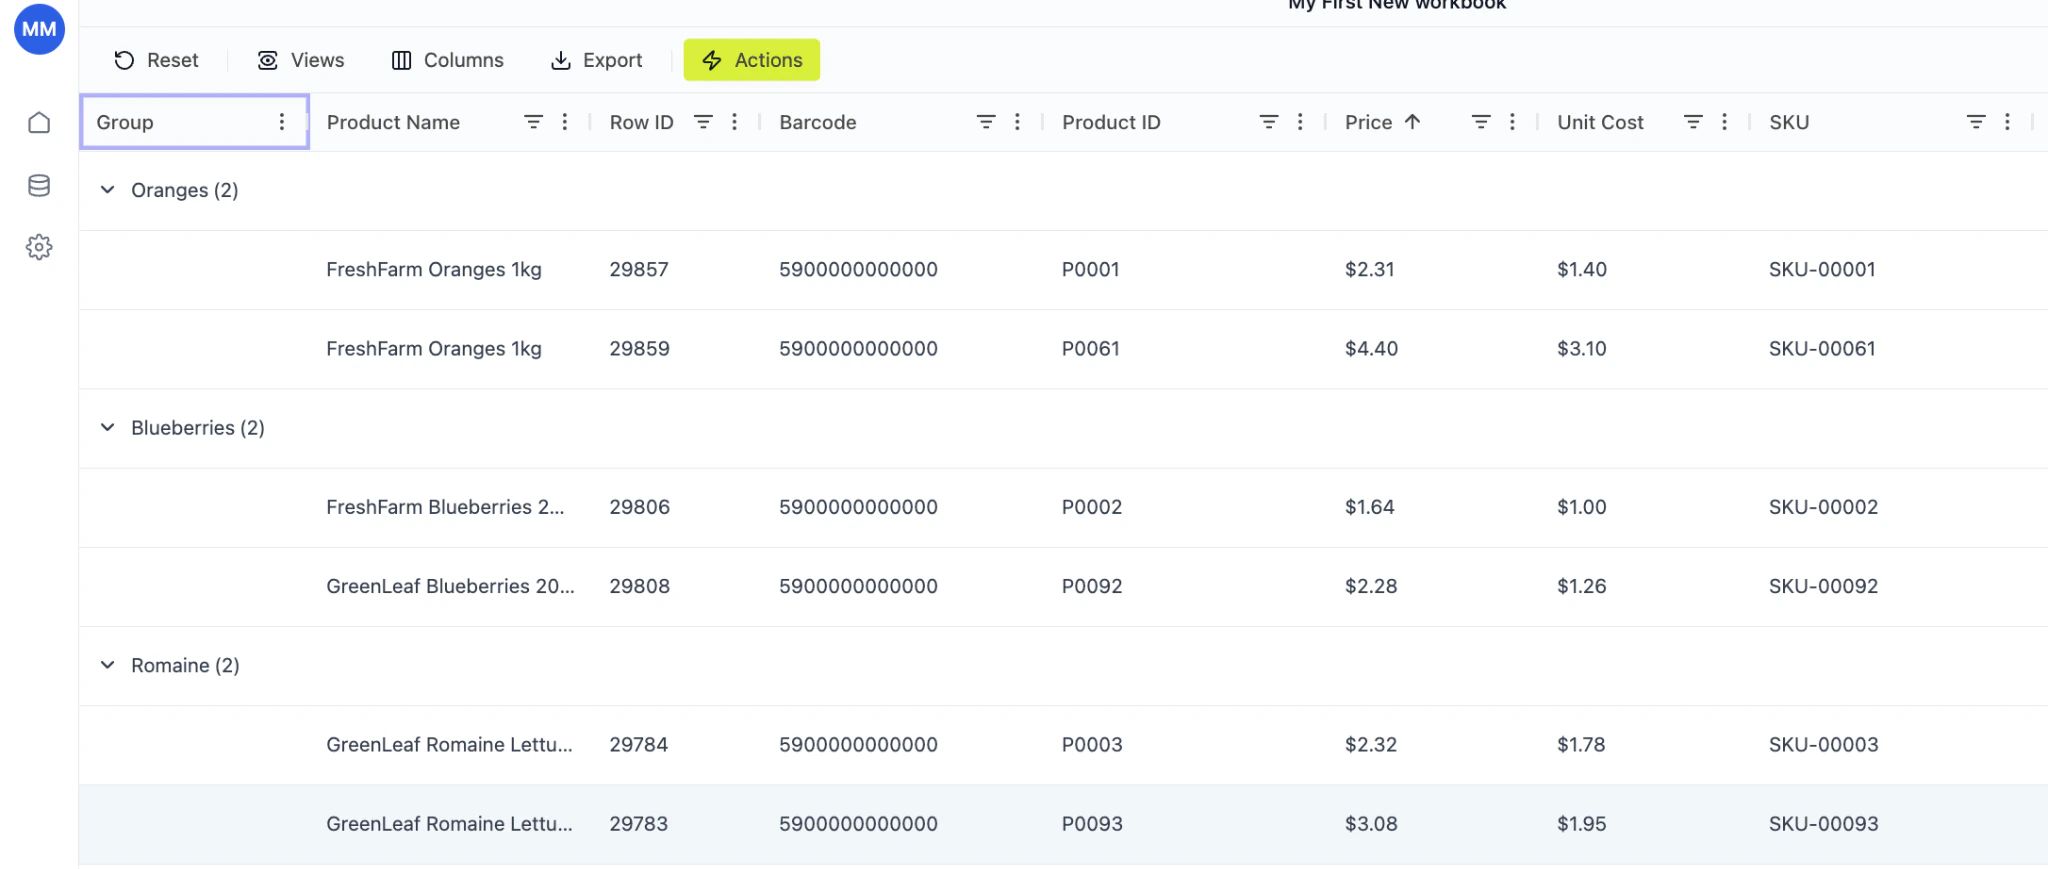
5. Group products
Grouping lets you analyze structured segments.How to group:
- Drag a column into the grouping area (if enabled)
OR - Use the Group column (if preconfigured)
- Group by Product Group
- Group by Brand
- Group by Category
- Oranges (2)
- Blueberries (2)
- Romaine (2)
Why grouping matters:
- Compare pricing inside category
- Spot inconsistencies
- Review margin distribution by group
Group
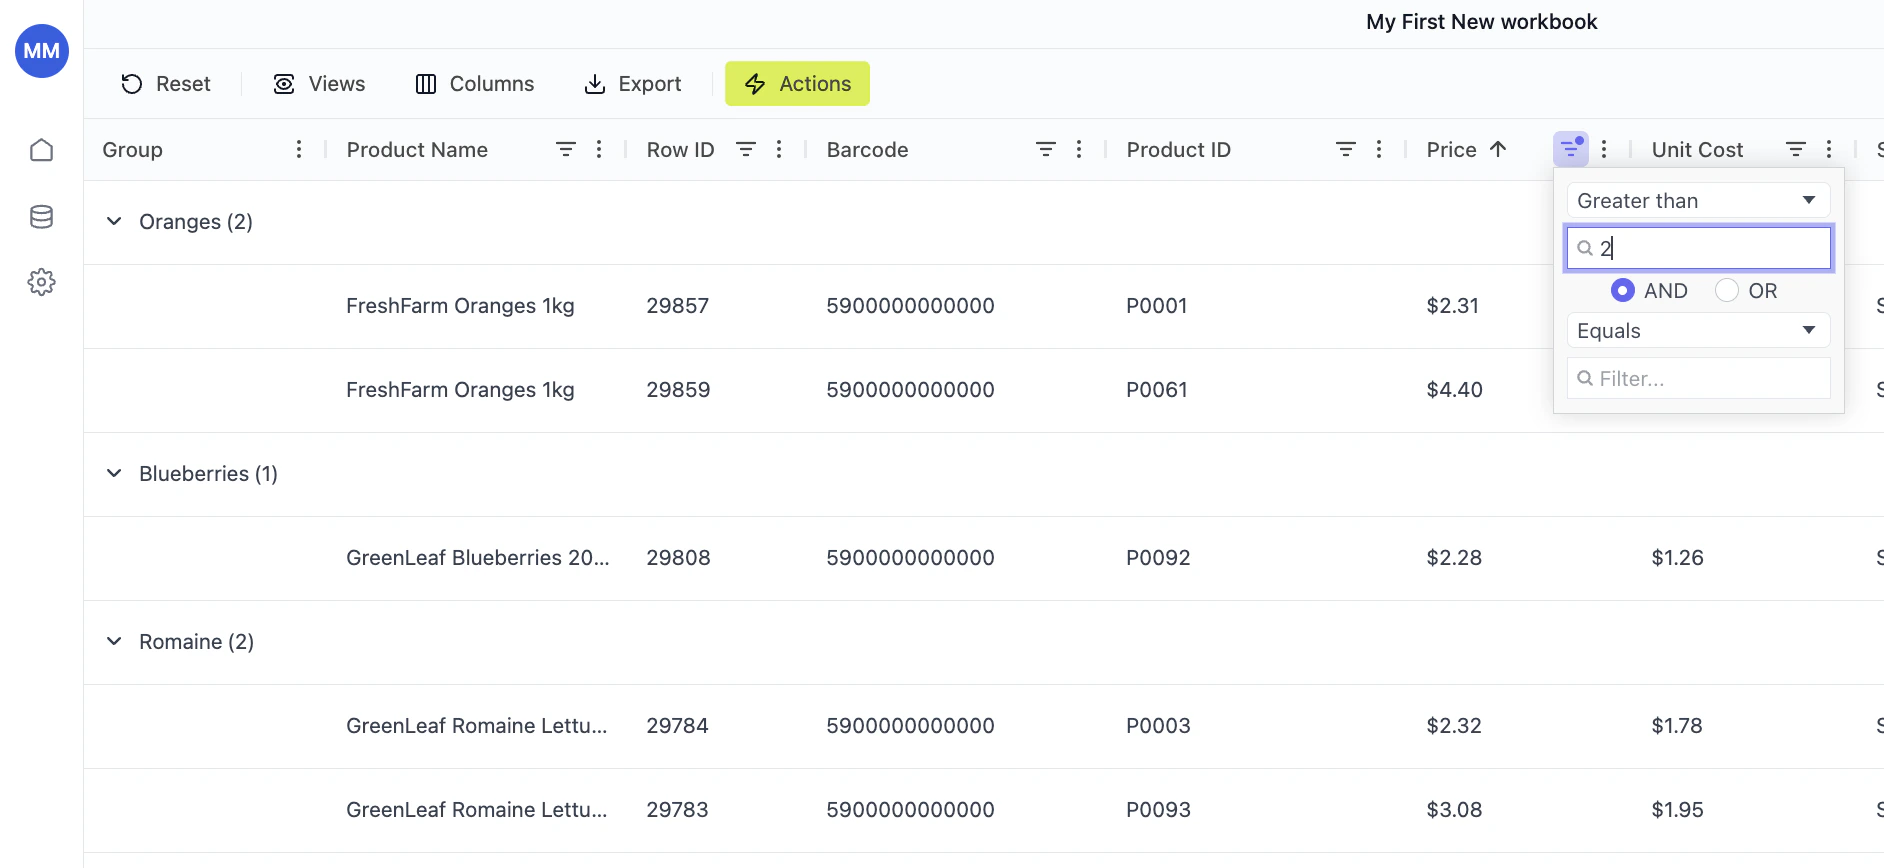
6. Filter columns
Filtering allows you to narrow down products based on specific criteria — instantly focusing on what matters. You can filter any column (numeric, text, status, etc.).How to apply a filter
- Click the filter icon in the column header
- Choose a condition from the dropdown
- Enter your filter value
- The grid updates immediately
Numeric filters (price, cost, margin, etc.)
For numeric columns, you can use:- Greater than
- Less than
- Equals
- Not equal
- Between
Example:
- Price Greater than 2
- Unit Cost Less than 3
- Margin Below 20%
- AND
- OR
- Price > 2 AND Price < 5
Text filters (brand, product name, SKU, etc.)
For text columns, you can filter by:- Contains
- Equals
- Starts with
- Ends with
Example:
- Brand equals Arla
- Product Name contains Greek
Filtering
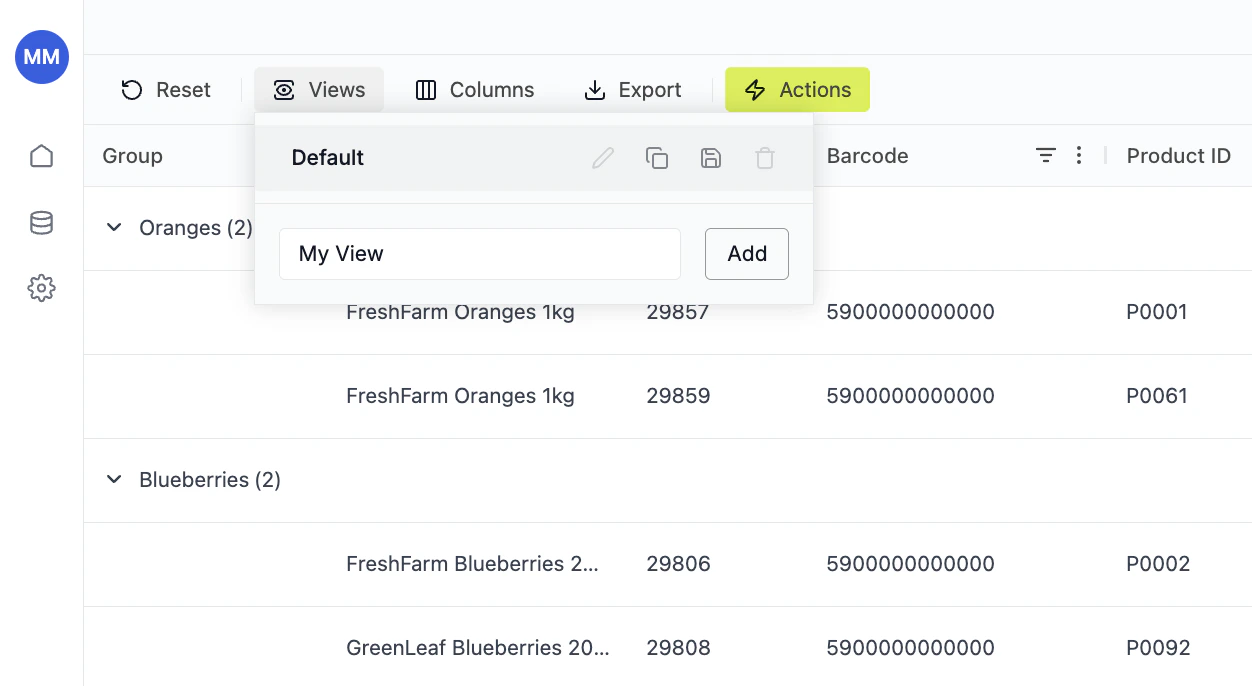
7. Save view as default or create your own view
Once your layout is configured, save it.How to save:
- Click Views in the toolbar
- Enter a name (e.g., “Margin Analysis”)
- Click Add
- Keep Default view
- Create multiple custom views
- Switch between them instantly
Example saved views:
| View Name | Purpose |
|---|---|
| Margin Review | Price, Cost, Margin columns |
| Competitive View | Price, Competitor Price, CPI |
| Operations | SKU, Barcode, Status |
| Elasticity | Elasticity, Revenue, Price Δ |