> ## Documentation Index
> Fetch the complete documentation index at: https://docs.retailgrid.io/llms.txt
> Use this file to discover all available pages before exploring further.
# Create grid
> Create a new grid by selecting products from your catalog to build a focused pricing and analysis workspace.
A Grid in Retailgrid is your focused pricing workspace — a selected set of products where you analyze, optimize, and execute pricing decisions.
## What is a grid?
A Grid is:
* A filtered subset of your product catalog
* A working environment for pricing and analysis
* A place to run agents, apply rules, and export results
You can create multiple grids for:
* A specific brand (e.g., *Arla*)
* A category (e.g., *Dairy*)
* A campaign
* A pricing experiment
* A country or channel
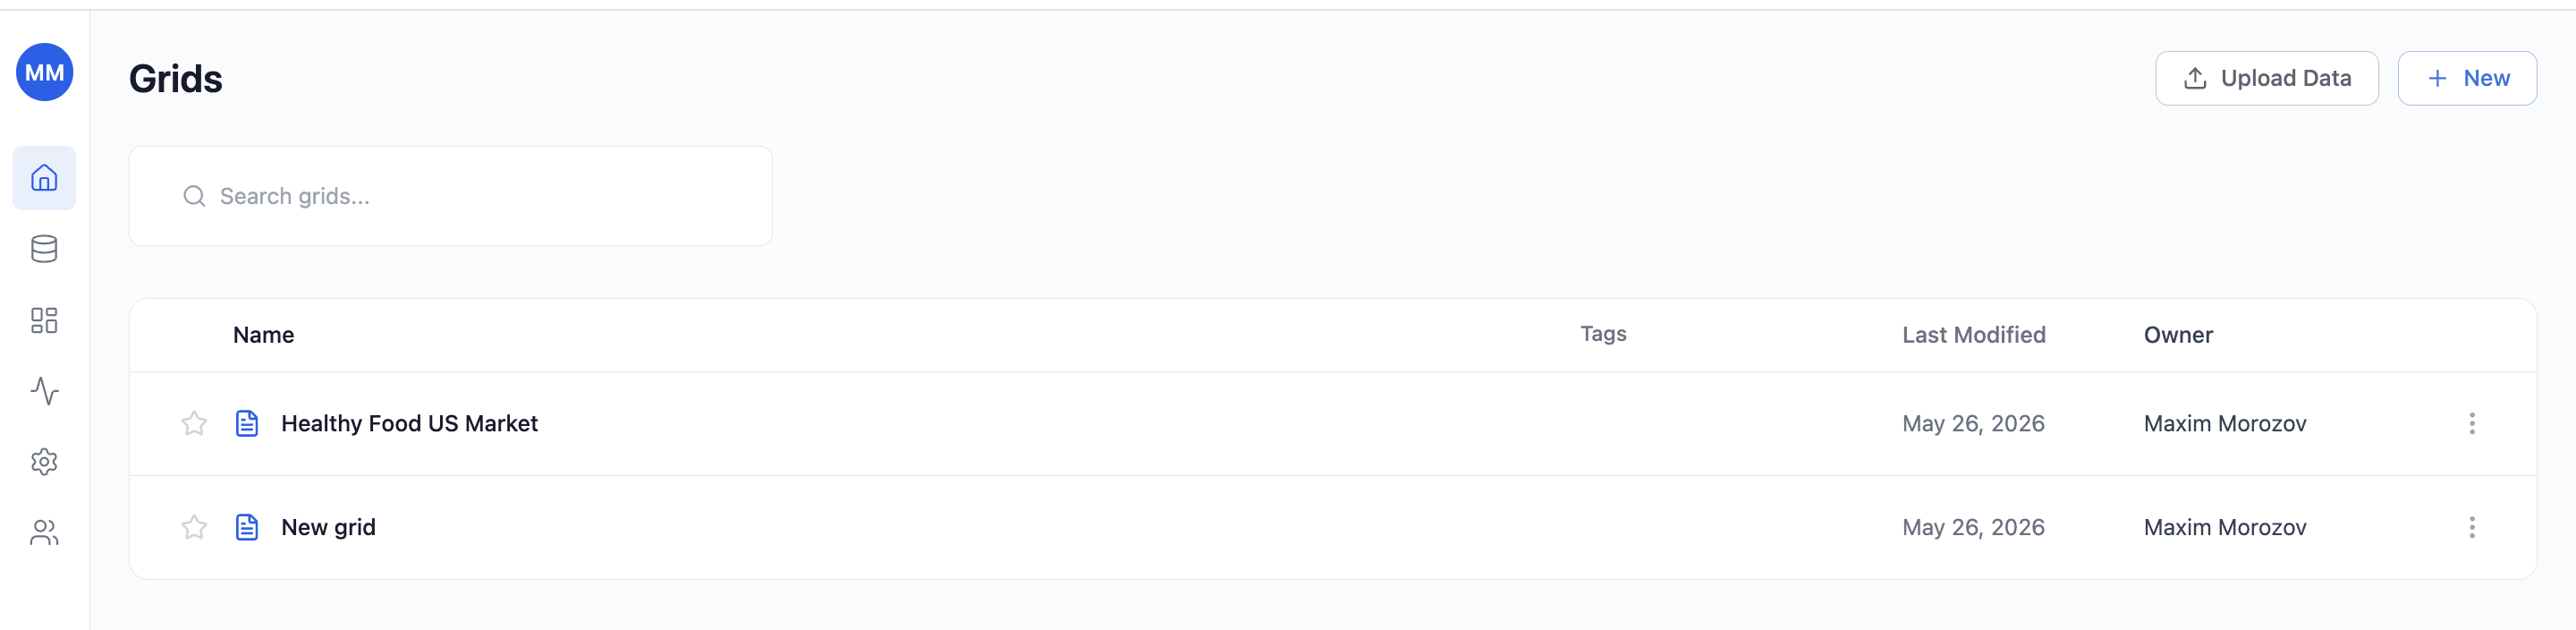
## Step 1. Go to grid
From the main navigation:
* Click **Grids**
* Click **+ New** (top right)
You'll enter the **Manual grid** creation screen.
## Grids view
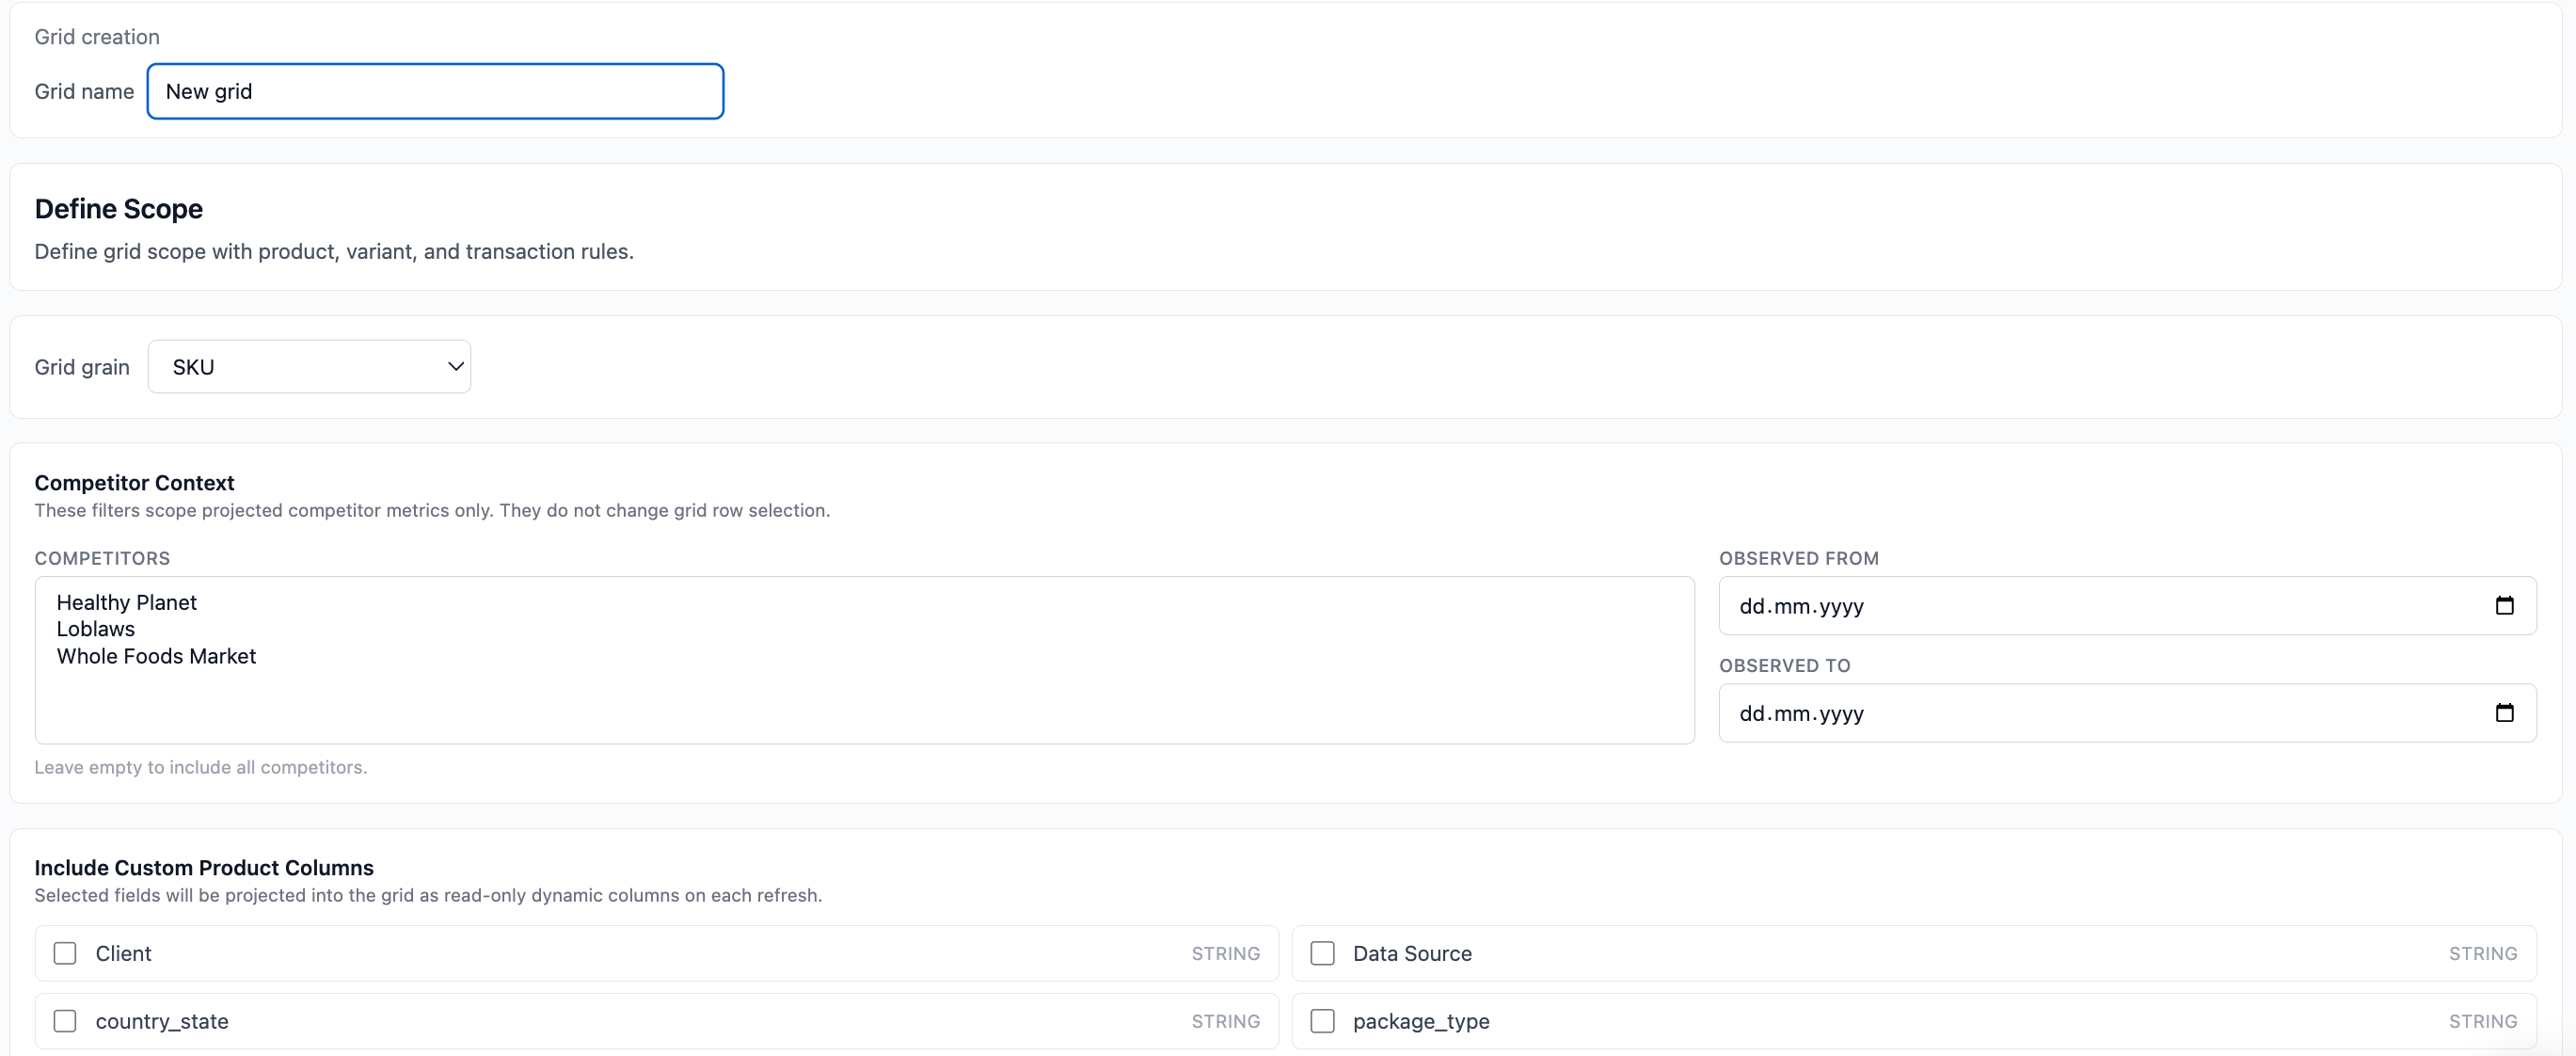
 ## Step 2. Name your grid
At the top:
* Enter a clear, descriptive name\
Example:
* `Arla`
* `Dairy – Margin Optimization`
* `March Price Test`
You'll see a live counter showing how many products are selected.
## Name your grid
## Step 2. Name your grid
At the top:
* Enter a clear, descriptive name\
Example:
* `Arla`
* `Dairy – Margin Optimization`
* `March Price Test`
You'll see a live counter showing how many products are selected.
## Name your grid
 ## Step 3. Search and filter products
Use filters to define your working scope:
* **Search products** (by name or ID)
* **Brand**
* **Product type**
* **Status**
Example:
* Filter by **Brand = Arla**
* Select all filtered products
The product counter updates in real time.
## Filter products
## Step 3. Search and filter products
Use filters to define your working scope:
* **Search products** (by name or ID)
* **Brand**
* **Product type**
* **Status**
Example:
* Filter by **Brand = Arla**
* Select all filtered products
The product counter updates in real time.
## Filter products
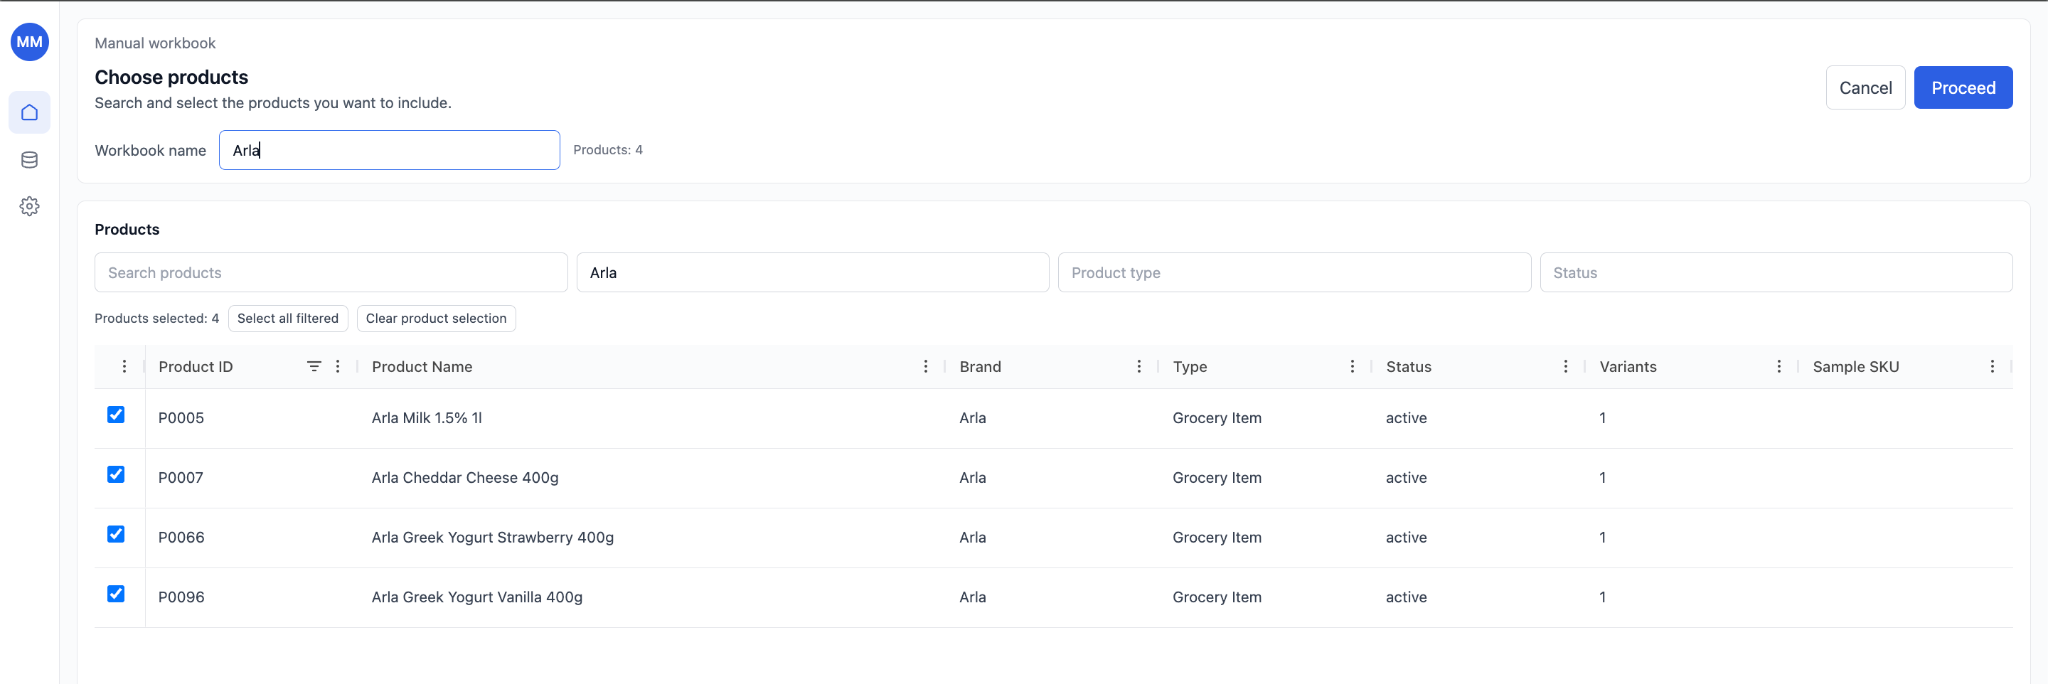 ## Step 4. Select products
You can:
* Select individual SKUs
* Select all filtered results
* Clear selection
This defines exactly which products will be included in your grid.
## Step 5. Click "Proceed"
After selecting products:
* Click **Proceed**
* Retailgrid creates your Grid
* You are redirected to the grid view
## Step 6. Start working in your grid
Your new grid opens in spreadsheet-style grid format.
From here you can:
### Analyze
* Sort and filter
* Compare price vs cost
* Review margin gaps
### Modify
* Edit prices directly
* Add calculated columns
* Apply bulk updates
### Execute
* Use **Agents**
* Run pricing rules
* Export data
* Prepare price updates
## Grid is ready
## Step 4. Select products
You can:
* Select individual SKUs
* Select all filtered results
* Clear selection
This defines exactly which products will be included in your grid.
## Step 5. Click "Proceed"
After selecting products:
* Click **Proceed**
* Retailgrid creates your Grid
* You are redirected to the grid view
## Step 6. Start working in your grid
Your new grid opens in spreadsheet-style grid format.
From here you can:
### Analyze
* Sort and filter
* Compare price vs cost
* Review margin gaps
### Modify
* Edit prices directly
* Add calculated columns
* Apply bulk updates
### Execute
* Use **Agents**
* Run pricing rules
* Export data
* Prepare price updates
## Grid is ready
 ## Change which products are in the grid
The selection you made in Step 3 isn't permanent. To add or remove products from an existing grid, click **Edit scope** in the top-right corner of the grid view and adjust your filters or selection.
## How your grid stays fresh
Every grid is refreshed automatically overnight with the latest data from your datasets. You don't need to trigger a manual refresh after replacing a file — the next night's run picks it up.
* **Nightly refresh** — runs once per day during an off-hours window and covers every active grid.
* **On-demand updates** — replace a dataset on the [Datasets page](/data-requirements/datasets) at any time; the change becomes visible in your grids on the next nightly refresh, or sooner if you manually run an agent against the grid.
* **Per-grid status** — failed refreshes are visible in the [Runs](/runs/overview) section, where `system`-triggered nightly jobs appear alongside user-triggered runs.
## Change which products are in the grid
The selection you made in Step 3 isn't permanent. To add or remove products from an existing grid, click **Edit scope** in the top-right corner of the grid view and adjust your filters or selection.
## How your grid stays fresh
Every grid is refreshed automatically overnight with the latest data from your datasets. You don't need to trigger a manual refresh after replacing a file — the next night's run picks it up.
* **Nightly refresh** — runs once per day during an off-hours window and covers every active grid.
* **On-demand updates** — replace a dataset on the [Datasets page](/data-requirements/datasets) at any time; the change becomes visible in your grids on the next nightly refresh, or sooner if you manually run an agent against the grid.
* **Per-grid status** — failed refreshes are visible in the [Runs](/runs/overview) section, where `system`-triggered nightly jobs appear alongside user-triggered runs.